Managing Packages
Follow these steps, on the application (such as staging) on which you have made changes, to create a package:
1.From the Configuration Console, click Build > Development Package > Packages to open the Packages workspace.
2.Click New Record. The application displays a blank package page.
3.Enter a descriptive name for the package. The name must be unique across the application.
4.From the Type drop-down list, select if this is an incremental or master package. You cannot edit the type after you save create the package.
•An incremental package is a single change. It can contain a set of metadata changes and can be imported and exported. There are two types of incremental packages: the first type is exported from the tracked changes in the data and metadata. Every data and metadata change is tracked with a sequence number, which specified the import order. The second type is a result of comparing the full metadata from two tenant instances (such as UAT and staging). There is no sequence associated with these changes. This content comes from the traditional Neurons for ITSM Operations Console migration.
•A master package contains one or more incremental, master, or file packages. The packages in the master package are called sub-packages. For example, you may want to create a master package with several incremental packages (sub-packages) in it.
5.In Neurons for ITSM Release 2016.x, the Predicate field is for internal use only. Do not enter anything here.
6.Enter a description.
7.Click Save.
8.Click Refresh to see the Close Package, Save As File, and Export Package icons on the top and the tabs at the bottom.
1.From the Configuration Console, click Build > Development Package > Packages to open the Packages workspace. The application lists the Neurons for ITSM development packages.
2.Double click a package to view its details.
The application displays the following tabs:
•Transaction Set tab (for incremental packages only). Refer to section Viewing Transaction Sets in Managing Transaction Sets.
•Transaction Detail tab (for incremental packages only). Refer to section Viewing Transaction Sets in Managing Transaction Sets
•Package Mapping tab (for master packages only). Refer to Adding Packages to a Master Package (Mapping).
•Package Aspect tab. Refer to Adding an Aspect to a Package.
•Activity History tab. Refer to About Activity History.
•Attachment tab. Refer to Adding an Attachment.
•Audit History tab. Refer to Accessing the Audit History.
You must create an incremental type package before you can assign transaction sets to it. See Creating a Package.
Follow these steps, on the application (such as staging) on which you have made changes, to assign transaction sets to a package:
1.From the Configuration Console, click Build > Development Project > Transaction Sets to open the Transaction Sets workspace.
2.Select the transaction sets to include in the package.
3.Click Assign To Package.
4.Use the drop-down menu to select the name of the package to which to assign the transaction sets and click OK.
You can also assign a transaction set to a package by clicking Build > Development Package > Packages to open the Packages workspace, clicking the Transaction Set tab, and clicking Add Change Set.
5.To check that the transaction sets are in the package, do the following:
| a. | Click Build > Development Package > Packages. The application displays the Packages workspace. |
| b. | Open the package. (If you do not see it, click Refresh.) The application opens the package. |
| c. | Click the Transaction Set tab to view all of the transaction sets. |
6.To remove a transaction set from a package, do the following:
| a. | Click Build > Development Package > Packages. The application displays the Packages workspace. |
| b. | Open the package. (If you do not see it, click Refresh.) The application opens the package. |
| c. | Click the Transaction Set tab to view all of the transaction sets. |
| d. | Highlight the transaction set. |
| e. | Click Remove From Package. |
7.To add a transaction set to another package, do the following:
| a. | Click Build > Development Package > Packages. The application displays the Packages workspace. |
| b. | Open the package. (If you do not see it, click Refresh.) The application opens the package. |
| c. | Click the Transaction Set tab to view all of the transaction sets. |
| d. | Highlight the transaction set to add to the package. |
| e. | Click Assign To Package. |
| f. | Select a package name from the drop-down list and click OK. |
You can only add aspects to a package if it is open. When you created the package, the application copied the aspects from the original package. You can remove the original aspects and add new ones.
1.From the Configuration Console, click Build > Development Project > Transaction Sets to open the Transaction Sets workspace.
2.Assign one or more transaction sets to a package.
3.Click the Package Aspect tab.
A package can have zero or more aspects. When the package is imported into target tenant instance, these aspects are entered into or removed from the target tenant instance to flag the aspect presence.
4.View the following information on the Package Aspect tab:
| Field | Description |
|---|---|
| To Uninstall | Specifies if the aspect should be removed. |
| Version | Numeric whole number for this aspect version. The version number for an aspect grows in its development life. |
| ID | A unique name for the aspect. |
| Vendor Name | The name of the vendor who provides the aspect. An example is Ivanti. |
| Vendor ID | A unique ID that identifies the aspect provider. Currently, the application uses "HEATsoftware" for aspects provided by Ivanti. In future releases, other providers will have a unique vendor ID. |
| Created By | The ID of the administrator who added the aspect. |
| Created On | The date and time when the aspect was created. |
| Modified By | The ID of the administrator who modified the aspect. |
| Modified On | The date and time when the aspect was modified. |
5.Click New Package Aspect. The application displays the New Package Aspect dialog box.
6.Check Is Uninstalled if this package aspect is uninstalled.
7.Enter the following information:
•Version number: Any number.
•ID: Any text.
•Vendor ID: Any text.
8.Click Save.
If you have a master package, you can add incremental or other master packages to it. In this way, the master package contains many changes. This eliminates the need to export incremental packages one at a time.
1.From the Configuration Console, click Build > Development Package > Packages to open the Packages workspace.
2.Open a master package.
3.Click the Package Mapping tab.
4.Click Assign Package. The application displays the New Master Package Mapping form.
5.In the Sub Package field, click the search icon to display a list of packages that can be mapped.
6.Select a sub-package and click Use Selected Release Package.
7.Enter a value into the Relative Order field. This determines the relative order of this sub-package compared to other sub-packages in the master package. The application applies the sub-packages to the tenant in this order (when you export and import the package).
8.Click Save.
9.Repeat steps 4 through 8 to add additional sub-packages to the master package.
You must close a package before you can use the Neurons for ITSM Operations Console to migrate it from staging to production. Closing a package means that you cannot do any more work on it, such as adding or removing packages, adding or removing predicates, changing aspects, and so on. You do not have to close a package to export it.
We recommend that you only close a package after you have completed testing on it and you are ready to migrate it from either staging or UAT to production. After you close a package, you cannot reopen it.
When a package is closed, the application does not display the Add Change Set and Remove From Package buttons on the Transaction Set tab, nor does it display the New Package Aspect and Delete buttons on the Package Aspect tab.
Follow these steps to close a package.
1.From the Configuration Console, click Build > Development Package > Packages to open the Packages workspace.
2.Highlight the name of the package to close.
3.Click Close Package.
4.At the confirmation prompt, click OK.
You can export a package of any type as an XML file and send it to another application, even if the package is empty. You can export any open or closed package. You can use any text editor to view the exported package.
•About Compacting Export Data
Starting in Neurons for ITSM Release 2016.1, you can compact the transaction sets for a package when you export it. If you make multiple changes to one business object consecutively, compacting combines the individual changes into one compact change. When you import the package, the application only implements the one compacted change instead of the individual changes, which speeds up the process of importing a package.
For example, if you changed a quick action 12 times consecutively, then without compacting, the package would have 12 transaction sets. With compacting, there is only one transaction set.
There are a few caveats to this:
•The application only compacts changes to metadata.
•The application does not combine creating a business object and changing a business object into one compact package. The application only compacts changes to a business object and in this instance, changing a business object does not include creating it.
•The application only compacts changes to the same business object of the same metadata type. If you change two business objects, the application does not compact these two changes together.
•Exporting a Package
1.From the Configuration Console, click Build > Development Package > Packages to open the Packages workspace.
2.Highlight the name of the package to export.
3.Click Export Package. The application gives you the option of compacting the transaction sets.
4.Click Yes to compact the export data or No to not compact the export data. The application exports the package.
You should never import a package into the production environment from the Configuration console when you have the Neurons for ITSM Operations console in place, as doing so could cause application instability.
We highly recommend that you always back up your database before importing a package.
Importing a package is an irreversible operation and cannot be undone.
You can import a package that has been previously exported. For master packages, the application imports the sub-packages in the given relative order. The application imports the package if its predicate evaluates to true. If the predicate evaluates to false or an error, the application does not import the package or its subpackages. After importing the package, the application uses the package aspects to update the tenant.
Starting from Neurons for ITSM Release 2016.1, the application scans the import package and assigns one of three impact levels (high, medium, and low) to each package.
| Impact Level | Definition |
|---|---|
| High |
Contains a database schema change. Deletes a business object. Updates a stored property for a field of a business object. Updates the IsLocalized property for a field of a business object. Updates the data type, length, or precision for a field of a business object. Updates a unique property for a field of a business object. Updates a nullable property for a field of a business object. Changes the index. Changes the full-text search index. Adds or deletes an audit field. |
| Medium |
Contains changes to the metadata for a business object. Adds a business object. Changes the metadata of a business object, other than the changes described above. Changes or overrides a business rule. Changes or deletes a form, list, layout, quick action, pick list definition, dashboard, chart part, list part, or special part. Changes or deletes a role. Changes or deletes branding. Changes a workflow, counter, view part, global constant, request offering, or report. Changes the email configuration. Changes integration settings. Changes the LDAP configuration or authentication provider. Changes the password policy. Changes an escalation schedule. |
| Low |
Does not contain a database schema change or changes to the metadata for a business object, or anything listed above. Adds a form, list, layout, quick action, pick list definition, dashboard, chart part, list part, special part. Add a role. Adds branding. |
Unlike in previous releases, starting in Neurons for ITSM Release 2016.1, you can sometimes import a package even when the application is in metadata read-only mode.
When the application is in metadata read-only mode, note the following:
•For high impact packages, you can only validate the import package. You cannot import the package.
•For medium impact packages, you can validate and import the package, but there may be risks with importing the package. We highly recommend that you back up the database first.
•For low impact packages, you can validate and import the package. We highly recommend that you back up the database first.
Follow these steps to import a package:
1.From the Configuration Console, click Build > Development Package > Packages to open the Packages workspace.
2.Click Import Package.
3.Click Browse... to navigate to the import package.
4.Highlight the file and click Open. The application displays a dialog box that lists the file name of the import package.
The Show Detail is selected by default which displays the details of the changes in the import package.
5. Click Preview Impact to scan the complexity of the import package. Depending on the impact of the import package, the application displays a screen that lists the details of the import package impact.
In case of package containing large tables or records over a million, such as in CI or Audit_CI, it is possible for the import to be unsuccessful or with warnings. Raise a Service Request to the Ivanti Operations team to take a backup of the tables and then apply the package.
6.Click Close. The application displays the Import Package dialog box stating that you should back up the database before importing the package, and that this action is irreversible.
7.Do one of the following:
•Select Validate to check the integrity of the package without applying it. If there are any errors, you can go back and fix them before importing the package.
•Select Validate and apply if no errors to import the package only if there are no errors. Note that the application may import the package even if there are errors on the application side. The application displays a message stating if there are any errors and where they are, either on the application side or on the validation side.
•Select Apply without validation. We do not recommend this option. With this option, you assume all responsibility to correct any errors after the import. This imports the package even if there are errors. You should always validate the package and understand the errors first, and then select this option only if you agree to ignore the errors.
8.Click Execute
9.At the confirmation prompt, click Yes. The application starts the import process.
If the package contains many changes, the import process can take a long time. Your application may time out or you may accidentally get disconnected from the application due to loss of wifi or VPN. If this happens, log in again. The application continues to import the package and display the importing message. However, the application may not dismiss the importing message, even after the import process has finished. In this case, click Cancel or Refresh to dismiss it.
The application displays a message about the success or failure of the import, including specifying if there are any warnings or errors.
If there are any errors, you cannot import the package. If you do not understand the impact of the errors, we recommend that you restore your database back to the production environment, as the error may disrupt your production operation. See Troubleshooting Package Import Errors and Patch Log Errors to troubleshoot errors or contact Ivanti for further information about the errors.
10.Click Close.
11.To view the imported package, do the following:
| a. | Click Build > Development Project > Projects to open the Projects workspace. |
| b. | Under the Name column, double-click the project that you just imported, to open it. |
Troubleshooting Package Import Errors
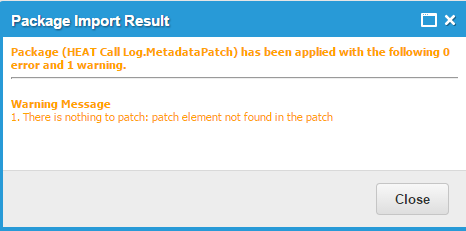
If you get any errors while importing a package, the package import fails. You must correct the errors before importing the package. If you get any warnings, the import continues; however, we strongly recommend that you correct the warnings before importing the package.
The application displays warnings in orange text and errors in red text.
Import Warning Example
Try the following for troubleshooting import package warnings and errors:
•If the error message references a sequence number, open the package in a text editor such as Notepad and look for that sequence number. Examine the package for information.
•From the Configuration Console, click Build > Development Project > Transaction Sets to open the Transaction Set workspace. Open the transaction set associated with the warning or error. Examine the transaction set for information.
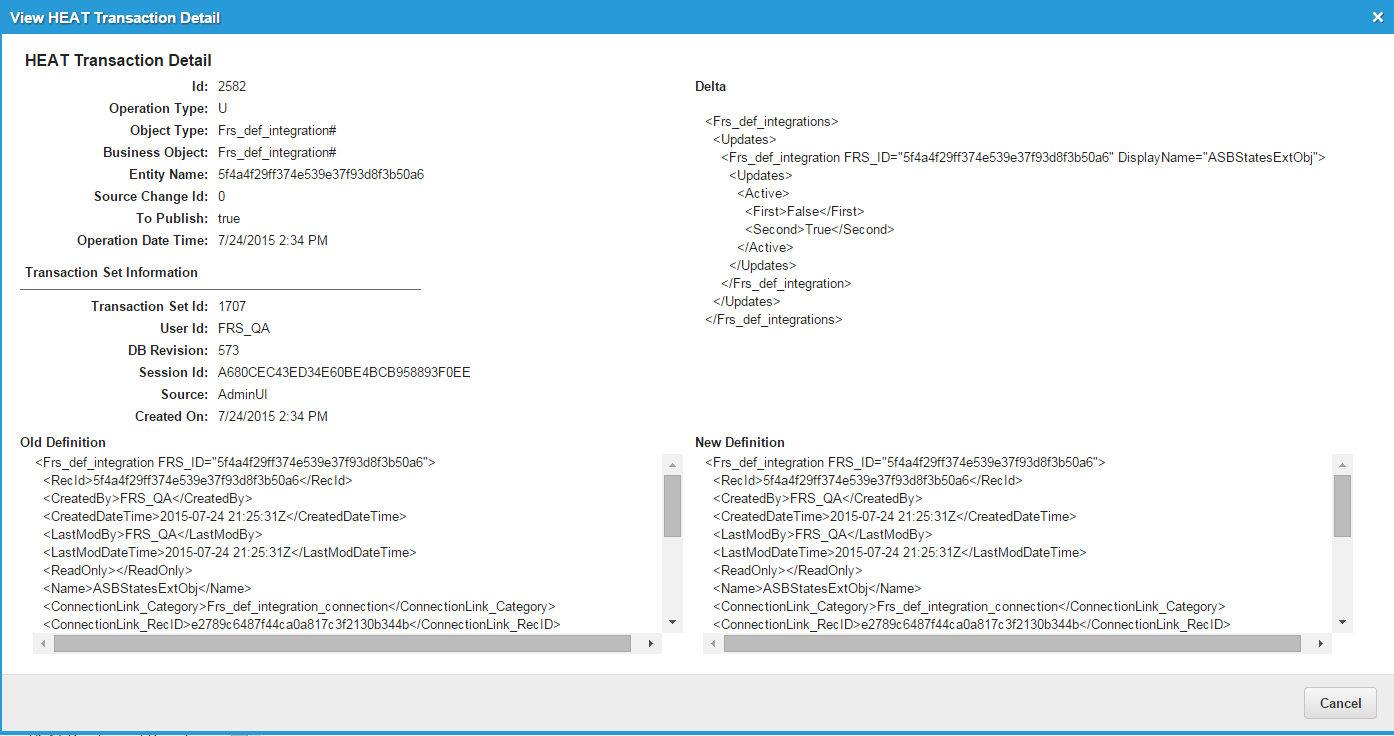
View Ivanti Transaction Detail
From release 2023.2 onwards, importing packages containing SQL queries is not supported for security reasons.
The importing of packages containing SQL queries is controlled using the feature flag SQLPackageConfig.
It is recommended to always keep SQLPackageConfig feature flag set to 'on' because SQL statements in the package may pose potential security threats.
The details of how it functions and what settings are applicable and allowed for cloud and on-premise customers is detailed below:
•Cloud customers
The feature flag SQLPackageConfig is set to False by default in version 2023.2 and 2023.3.
From 2023.4 onwards, the feature flag SQLPackageConfig will be set to True by default and therefore packages containing SQL statements may fail with a warning that the SQL statements failed to run.
Solution:
If you must import packages with SQL queries, then refer to Creating a Package use an alternate method.
•On-premise customers
See Importing Packages with SQL for On-premise Customers for details.
For any more queries, reach out to Ivanti support at https://www.ivanti.com/support/contact.
Before you enable and use the Neurons for ITSM development project, reach out to Ivanti Support at: https://www.ivanti.com/support/contact.
Troubleshooting Errors while validating or applying ITSM Package that contains SQL Queries
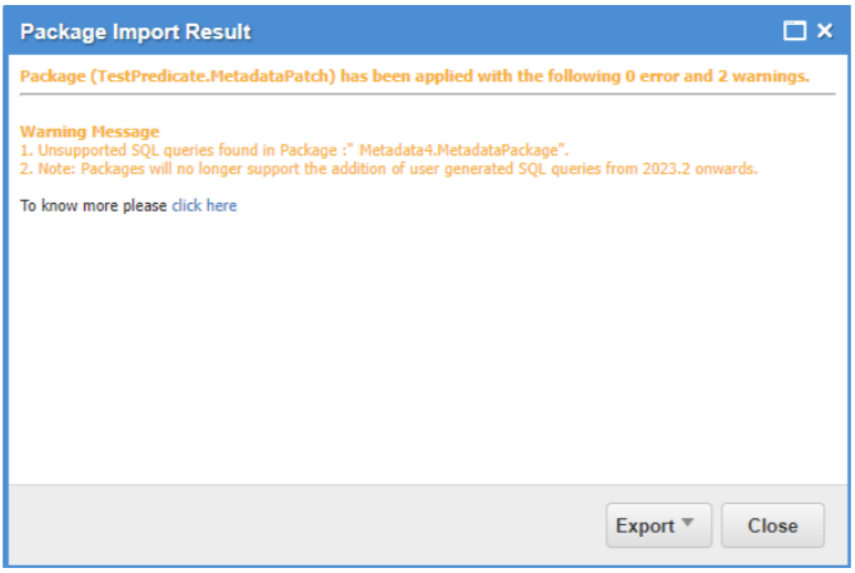
While validating or applying the ITSM package, the following warning message appears.
Import Warning Message
Review the following alternative approaches to resolve the issue:
•Re-create the package by removing the SQL queries. The SQL query related transaction can be included in the form of metadata transaction. For instance, if SQL query is inserting the Picklist values for any given business object, the same values can be included in the metadata package under transaction section. For information about creating a package, refer to Creating a Package.
•For technical assistance, contact https://www.ivanti.com/support/ivanti-support.
The Rollback Package feature allows you to revert imported packages.
Feature Eligibility: To use this feature, contact your Ivanti Account Manager and request activation of the EnableRollBackfeature feature flag.
•Only packages created and imported after database schema revision 758 in the 2026.2 release are eligible for rollback. Packages imported before this release cannot be rolled back.
•This feature supports only packages that are not associated with a binary file update. Do not attempt to roll back any package that requires reverting an installed binary file, as this action may cause data loss.
•This feature supports only metadata packages. It applies to packages imported through the application.
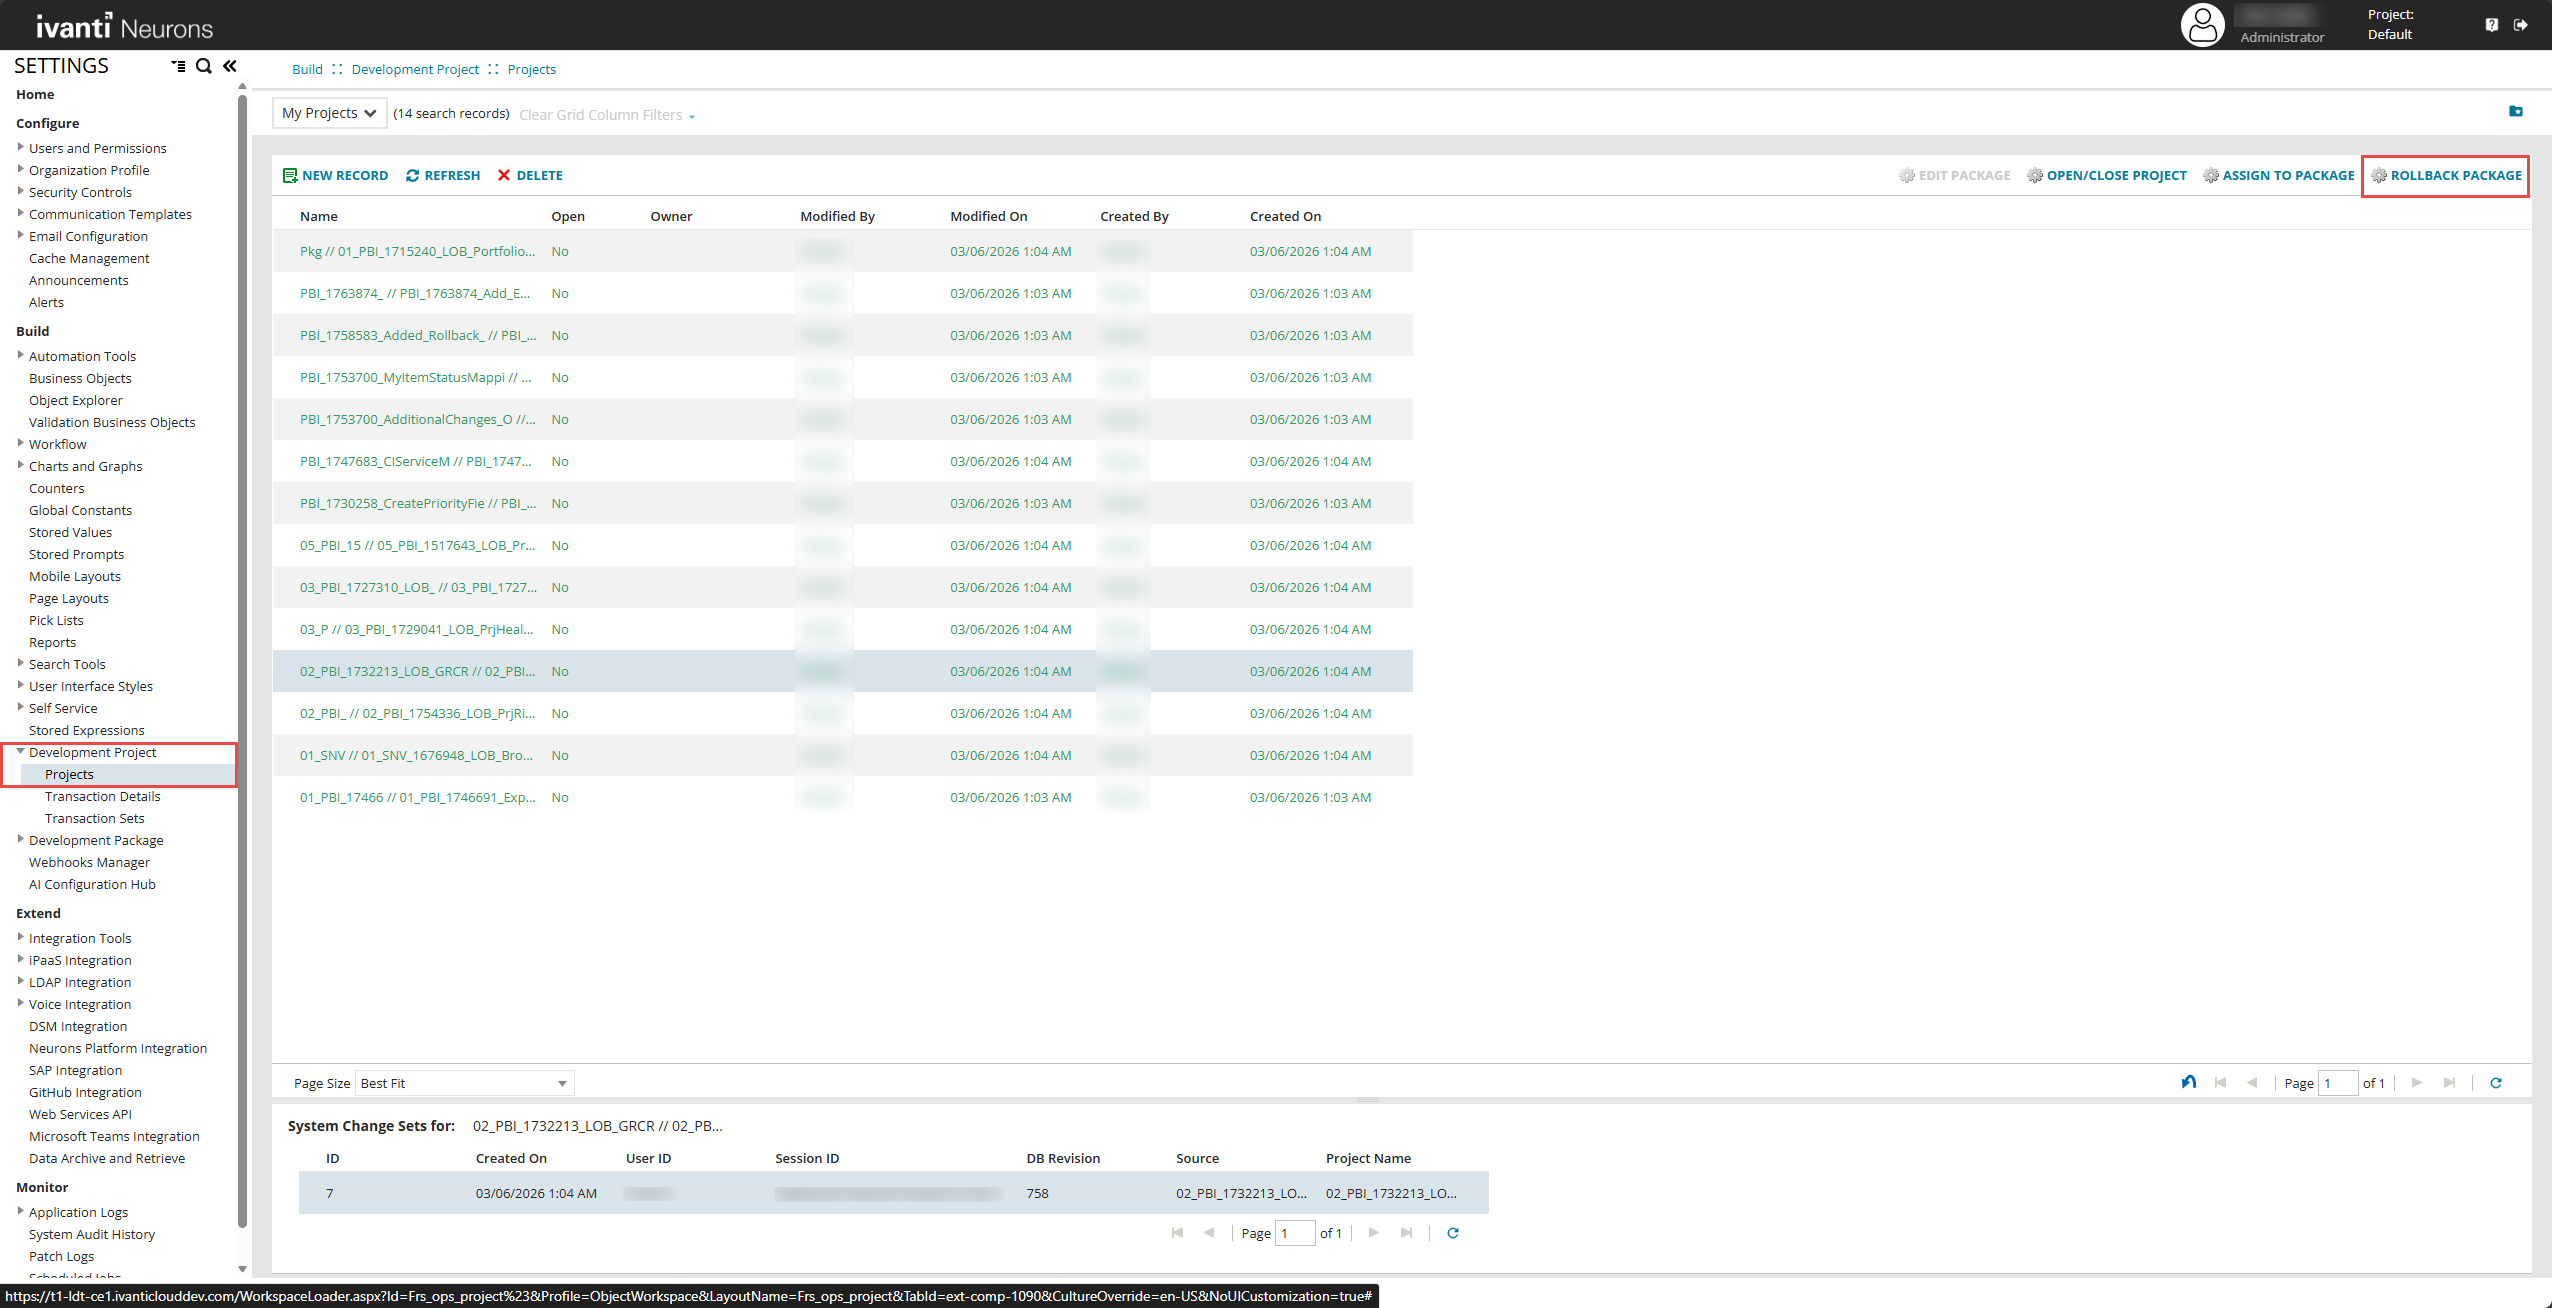
To rollback a package, do the following:
1.From the Configuration console, click Build > Development Project > Projects.
2.Select the package you want to rollback.
3.Click Rollback Package.
4.Choose one of the following options in the Rollback Package dialog:
•Validate
•Validate and apply if no errors
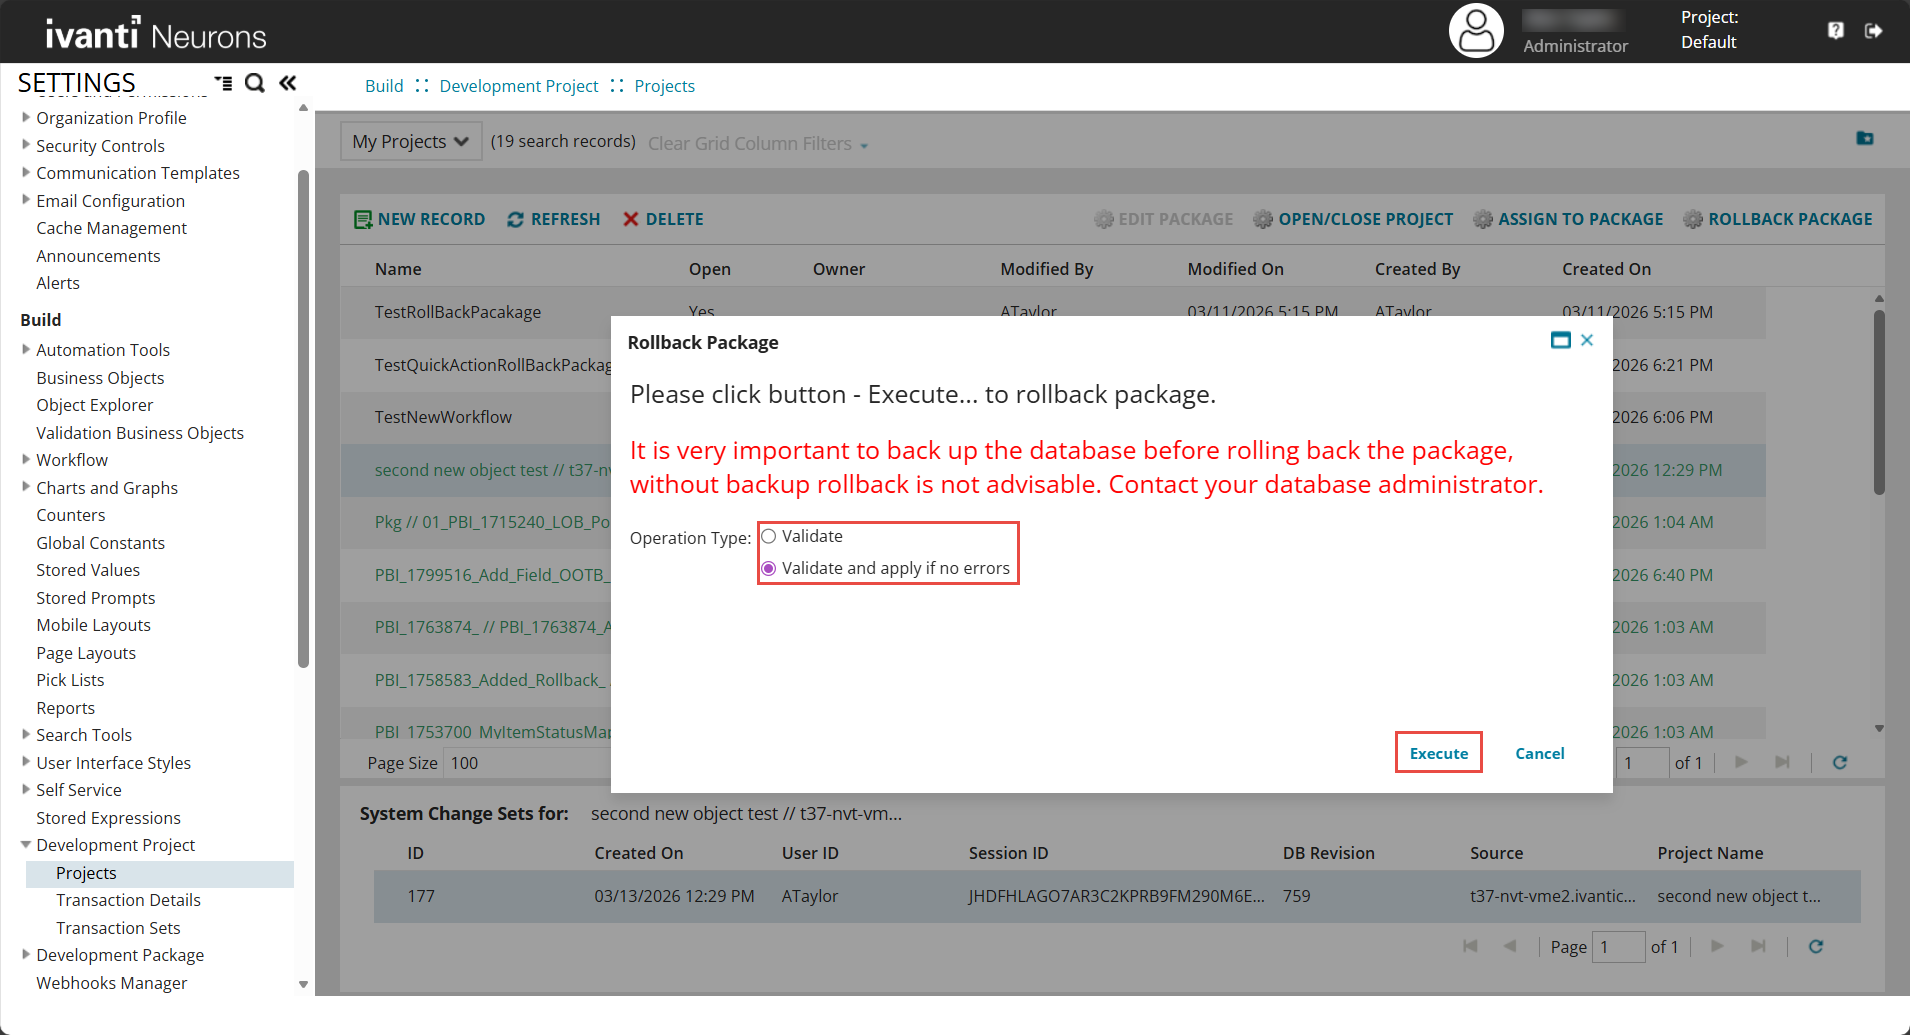
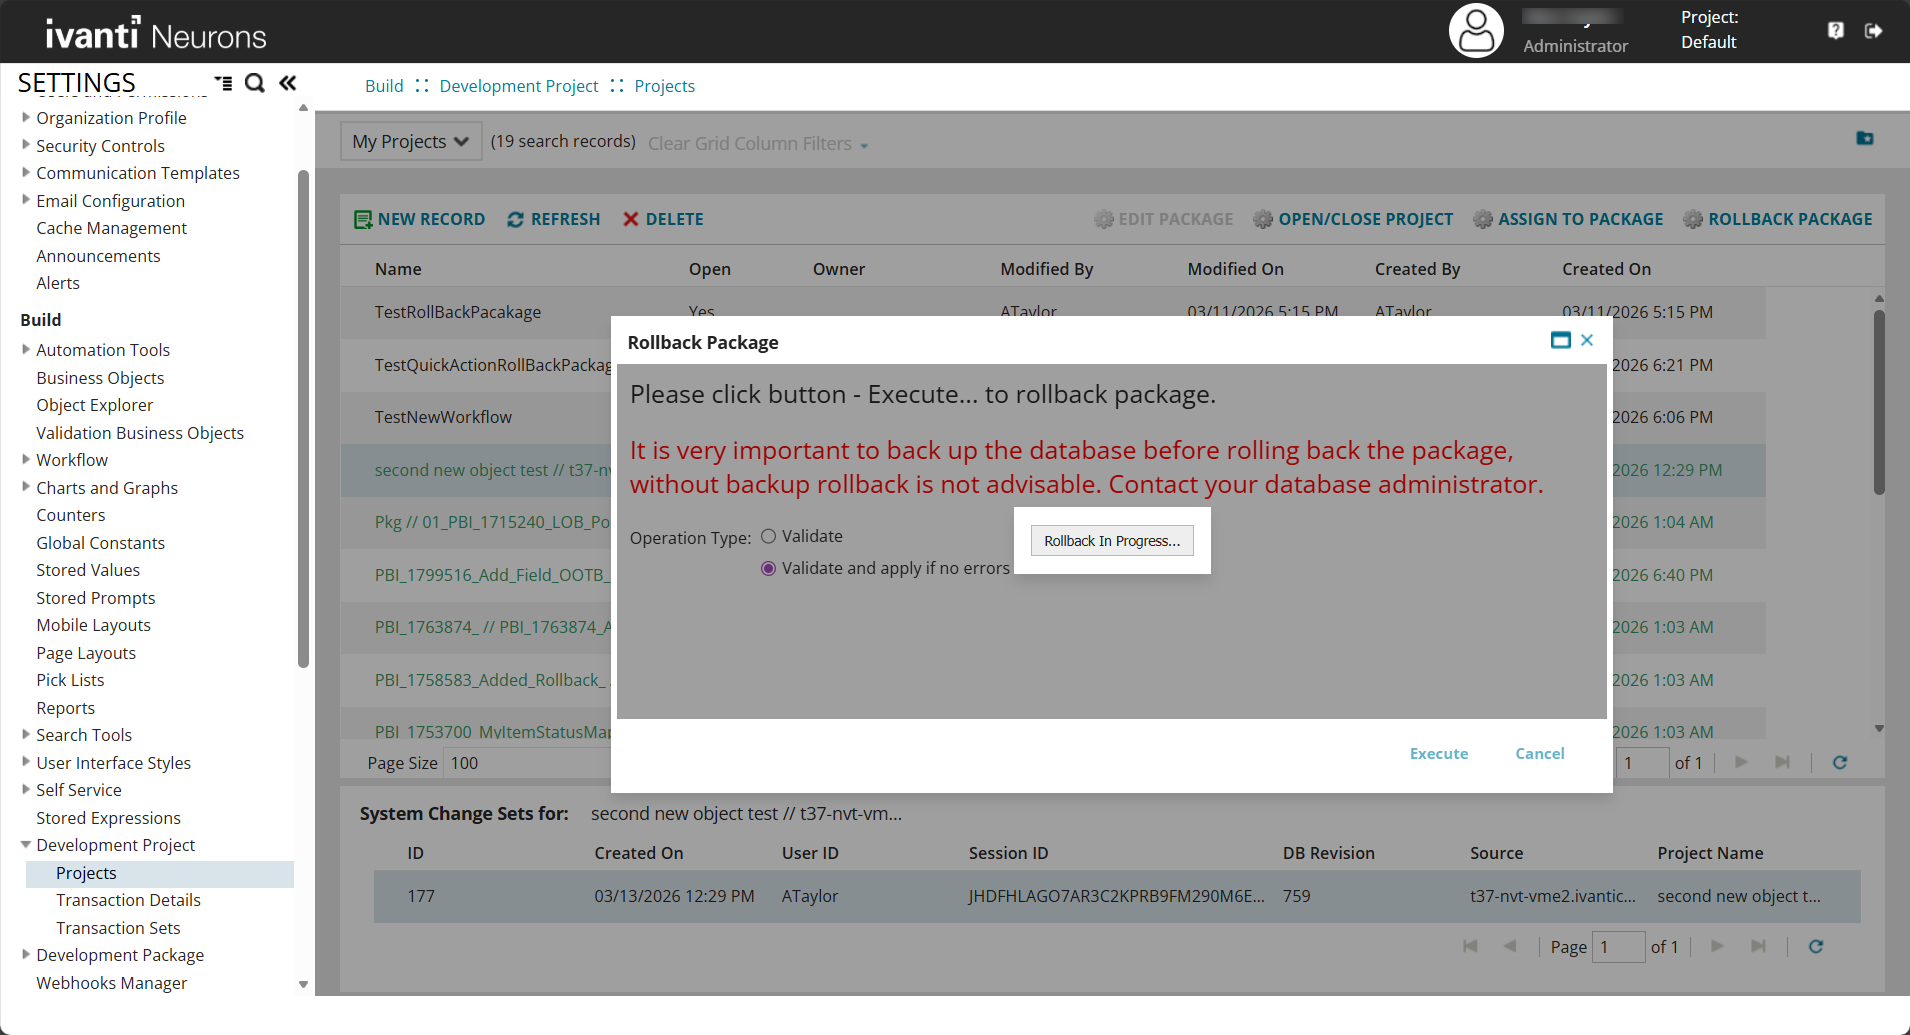
5.Click Execute to start rollback.
The rollback progress appears on the window.
•If the rollback successfully completes, click Ok to continue.
•If an error occurs, it appears in the dialog box.
•Rollback Package button is available only in the Projects workspace list /grid view.
•After a successful rollback, click refresh, now the project is deleted from the Project workspace.
Supported Package Types
The Rollback Package feature is currently in preview. The following package types are compatible with rollback.
•Fields
•Layout
•Forms
•Grid
•Global Constants
•RuleOverride
•Roles
•Business Rules
•Relationships
•Workflows
•Quick Actions
Unsupported Package Types
The following package types are not compatible with rollback.
•SQL patches
•Command patches
•SSIS (SQL Server Integration Services) patches
•Web Service Connections
Limitations
•The Rollback Package feature is not supported for Central Configuration.
•A package can be rolled back only once. The system prevents additional rollbacks of the same package.
•Do not manually modify, rename, delete, or reposition fields added by a package before rollback. Manual changes may cause rollback to fail or apply incorrectly.
•Rollback is blocked if a package contains more than 20 transactions. To process larger packages, split them into smaller packages (20 or fewer transactions each).
•If a field is removed during a rollback, the transactional data associated with that field will be permanently deleted.
•Only users with Administrator privileges can perform rollback operations.
•Rollback applies to metadata changes only (layouts, fields, forms, grids, business objects). It does not roll back data records or transactional data.
•Do not perform rollback while other users are importing packages or making metadata changes. Concurrent activity may cause conflicts or corruption.
•The system does not support selective rollback of individual transactions within a package.
Back up the database before performing a package rollback. Rollback may cause corruption and data loss.
Before importing the package, you can export the impact details into a PDF or text file and analyze the impact to take necessary action.
The impact details is organized by the sub-packages or metadata and displays all the dependencies and details for better insights into the package import requirement and to troubleshooting issues.
1.In the Import Package dialog box, select the Show Details check box and click Preview Impact.
2.In the Package Impact Details window, click the Export drop-down text and select either PDF or Text.
The impact details is downloaded in the selected file type.
You can save an incremental or master package as a file (but you cannot save a package as a file if it is already a file) so that you can have a record of it at a certain time. This is similar to versioning the package. You can export or import packages saved as files. All aspects in the package are copied to the file, but you can edit them after they are copied to the file.
Follow these steps to save a package as a file:
1.From the Configuration Console, click Build > Development Package > Packages to open the Packages workspace.
2.Highlight the name of the package to save.
3.Click Save As File.
4.Enter a new name or description, or leave the default values.
5.Click Save. The application saves the package as a file.
6.Click Refresh to see the new file in the file list.
You can only delete a package if it is open and if it is not being used by another package.
1.From the Configuration Console, click Build > Development Package > Package to open the Packages workspace.
2.Highlight the name of the package to delete.
3.Click the delete icon  .
.